Sri Lanka

Just back from 2 weeks in Sri Lanka.


This is a brilliant place for photography – wonderful scenery, exotic birds and other animals, and friendly smiley people who are happy to be photographed.


I left my full-format D700 at home, because the D300 is much more flexible, with its 18-200 VR do-anything lens that I used most of the time, and the 10.5 fisheye. But I also had a 70-200 f2.8 along for a bit more quality and the ability to extend for the bird shots, and then an SB800 flashgun, a close-up accessory lens, and a small carbon tripod.
Not to mention my Canon S90 pocket camera that was always with me, and for example contributed with the pictures of Lotta in the sunset.
I was a bit worried about my full memory cards getting lost or stolen, but with 30 MB at the end it was going to be very tedious to copy them at an internet cafe, and handing them over to a stranger to copy seemed too risky. An iPod or dedicated photo backup device would have been a good solution but I was too mean to buy one just for this trip, so in the end I just locked them in the safe at the hotels, and held very tightly on to my camera bag in between.
More pictures and a full trip report are here : Sri Lanka pictures

Pocket cameras

Here’s a picture taken with the tiny pocket camera that I always have with me :
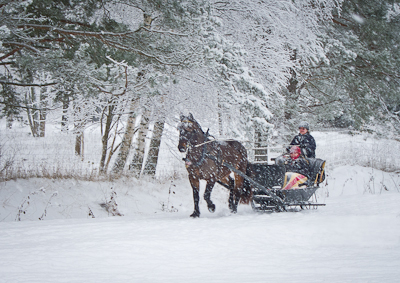
One horse open sleigh
The weather was bad and I was just taking a quick walk on which I didn’t think it was worth lugging my usual 8kg of gear, when I heard sleigh bells through the forest and these guys came galloping past me. I just had time to pull out my Canon S90 and take this shot before they were gone, trailing only the sound of jingle bells.
It was a pretty magical first-of-advent morning, but I would have been mad if I hadn’t caught it on ‘film’.


If I’d had my DSLR with me the result would have been sharper, less noisy, and I could have taken several frames and chosen one where the position of the horse’s hooves better showed how fast they were going, but I didn’t, and that’s where pocket cameras come into their own. They can always be there.


The downside of pocket cameras is that they have tiny sensors that show more noise, especially in poor light, and can’t handle as much contrast as bigger sensors. The cameras tend to be slow to respond too, have limited frame rates, and make terrible indoor portraits if you need to rely on the built-in flash. But for static subjects in good light, A4 prints can be embarrassingly similar to the result from cameras costing and weighing 10 times as much. It’s also way cheaper to buy an underwater housing for a pocket camera. They are good for close-ups given their large depth of field, and I often grab my S90 for a close-up even if I’m carrying my DSLR, just because it’s quicker and easier and the results are so good. And a less technical advantage is that people find them less intimidating – no one has ever refused to let me shoot them with the S90, but if I have the big Nikon they often get suspicious of my motives, and sometimes just refuse.


Since all my other gear is Nikon I would have liked to stayed with them so that I would get less confused moving between different menus and button layouts, and could use my big automatic flash, but for the last few years Canon have simply been way ahead on the pocket camera market, and the S90 was the first model that I considered to have sufficient quality in a small enough body to be worth buying. It’s replacement, the S95, is very similar, but has higher resolution video.


Here are some more S90 examples.

Update 2014 : The S90 has finally been eclipsed after an impressive 5-year reign.
I now use a Sony RX100-II, which has significantly better image quality, but even better, it doesn’t have the shutter lag of the Canon.
Here’s a selection of pictures from it : RX100 examples.

The Butterfly House

Today I took a trip to The Butterfly House in Stockholm with Johannes
It was mostly for fun, but also a bit of training before my trip to Sri Lanka.

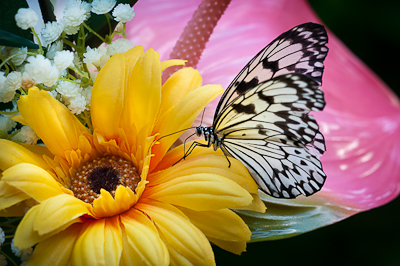
Butterfly at fjärilshuset

Being the first day after the school holidays it was very quiet and not much of a problem to use a tripod. Flashguns are ‘discouraged’, but the nice lady on the desk said that we could use them if a picture ‘really needed it’. It was -5 C out, and we walked from the far car park, so it took 15 mins or so for the cameras to warm up and stop fogging. Next time I would put mine in a plastic bag and sit it on a microwaved bag of rice for the journey, and/or have it in the footwell of the car with the heater on. We chose a sunny day, but despite the buildings being made of glass, light was still a bit of a problem.
But there were plenty of pretty flowers and butterflies, and new ones were hatching all day. Definitely a place I’d recommend to go for an afternoon of shooting off season.
Here’s the result : Butterfly show
Most of the pics were taken with a Sigma 150mm macro, apertures between f5.6 and f11.

Exhibition at Georg Lulich gallery

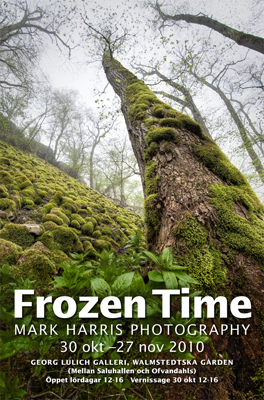
Poster for exhibition at the Georg Lulich gallery is off to host his LA exhibition during November, so I get to take over his gallery for the month. Amongst other things I’ll be showing my canvas nature prints, some horse pictures, and I’ll also be selling A5 greetings cards with winter and Uppsala motifs.

The opening is on Saturday 30th October, officially from 12-16, but probably longer since it’s also the opening of the light festival that evening.
Then I’ll be open every Saturday at least from 12-16, until the 27th November, which happens to be the first of advent.
Weekdays I’ll open when I have free time, so call or mail if you’re in town then and want to see if I’m there.

The Georg Lulich Gallery is in Walmstedska Garden, Sysslomansgatan 1, Uppsala.
That’s between Saluhallen and Ofvendahls, next to Kultur Kafeet.

Nov 29 – And now it’s over, so Georg’s pictures will be back next weekend.
I had a lot of fun talking to the 500 visitors that passed through, and am very glad that I got the chance to do this.
If you missed it, my next exhibition will be at Gottsunda library next March.

Fisheye lenses

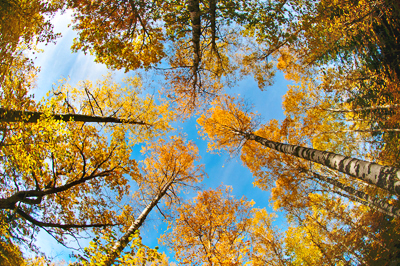
I took this pic a few days ago, and it reminded me why I love my fisheye lens :
Trees in Lilla Djurgården, Nåntuna, Uppsala

I used to think that fisheye lenses were just for fun special effects, and weren’t useful often enough to buy one, but last year I found a cheap used 10.5mm nikkor in the US, and bought it for climbing photos.
Since then I’ve found it more and more useful, especially when combined with software that can correct the bending of straight lines that is a characteristic of fisheyes. I bought PTlensEdit which works well, but now my workhorse Lightroom 3 can do the same thing. Another interesting program is FisheyeHemi, which partially corrects distortion without doing weird stuff to faces. When you apply these corrections, you no longer get a 180 degree view (more like 100), so you now have the same effect as you would get with an optically corrected rectilinear lens. ie you get two lenses for the price of one. Correction is good for architecture and other ‘straight’ subjects, but with irregular subjects the distortion is often surprisingly hard to notice.
The challenge of using a fisheye is avoiding too much clutter around the edges of the frame, including feet and tripod legs. 180 degrees is a lot composition to work with. The upside is that depth of field is enormous, and they often focus very close too.
So, if you too have dismissed fisheyes as a gimmic, have a look at the following examples and think again : Fisheye show

Blog start

I’ve resisted the temptation to blog for a long time, but since a lot of my friends ask me the same questions about cameras, I thought it might be a good idea to think about the answers a bit more carefully and publish my thoughts. I hope someone finds something useful here.
In case you don’t know me, I’m a Brit who has been living in Sweden for 25 years, and have been earning my living as a freelance photographer for the past 10 years.

Blog experts insist that if you don’t blog at least once a week, then you shouldn’t blog at all. Well I’m afraid you won’t get that frequency from me.
What you will get is a series of hopefully instructional posts scattered over many years. If I haven’t blogged for a while it’s not because I’ve stopped working, but the opposite – I haven’t had time to write a well-thought-out post, and I’d rather wait until I can.

Meanwhile, more photographs and other information can be found at the Frozentime Images website.
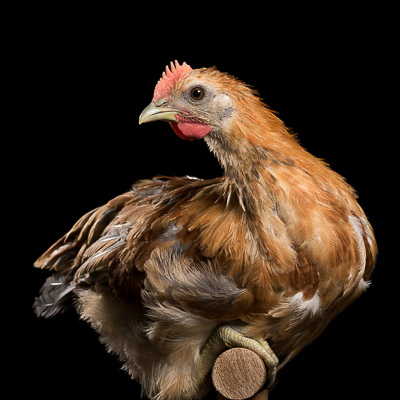
And here’s a chicken. He’s called Linus.


Linus, a Hedemora chicken

Review of Camranger used with Nikon D800/Mac Book Air.

I don’t normally do reviews, but since the product is quite new, and there are so many hardware and software configurations, I thought I’d write on my experience of using the Camranger with a Nikon D800 and Mac Air.

What is it ?
The CamRanger is a piece of hardware that allows wireless control of cameras and wireless transfer of images, using a laptop/iPad/iPhone. Find out more at camranger.com. It’s expensive (300 USD), but not only does it do away with cables, it also provides better software for shooting ‘tethered’ than I have been able to find for the Nikon/Mac combination.

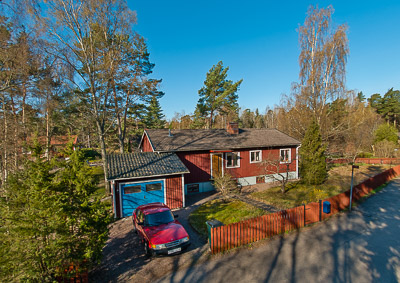
You can get wireless liveview, focus checking, and control most of the settings of the camera that are normally controlled by the camera buttons. It’s invaluable for mast photography, but I also use it for routine jobs in preference to a wired tether.

Soundbite
I love it !
Mast work

Setup
It was very easy to set up, just download the control program to the laptop, type in the WiFi settings to the Settings app of OS X, plug in the CamRanger to the USB slot on the camera, start the control program, and you are away.
I then set the preferences to automatically download image files, since I like to have copies on both the camera card and the laptop, partly for security, and partly so I can immediately start working on them in Lightroom.
I also set the connection mode to “camera” rather than “PC”, since this allowed me to fire the camera by hand, if I want to.

In use
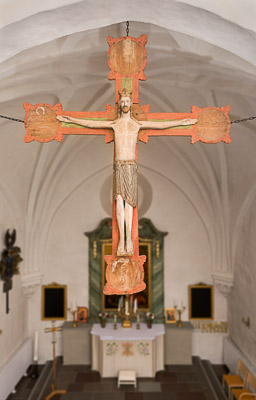
Once set up, I could send the camera up to the top of a 4m long mast, and then control pretty much everything except of course the zoom setting on the lens. And when it came down I could continue shooting by hand from the camera.
When triggered from the laptop, the camera fired immediately, and the jpeg thumbnail from the raw file appeared within a second, and the 36MP raw files were delivered in under 10 seconds, after which I could zoom in to 100% to check sharpness again. With the camera set to raw+large-basic-jpeg the file downloaded in about 2 seconds, and I could check the focus on that.
With Lightroom set to monitor the image folder, I could start doing serious work on the files immediately too.

I also have the motorised tripod-head controller for the Bescor MP-101, which also works as advertised, from inside the same app.

Issues
Mast work

1) The big one was that sometimes the app complained that it couldn’t make a connection with the camera, and once that happened it took a long time and/or fiddling to get it back.
I was working in remote rural churches, so it’s hard to imagine that electrical interference was the problem. I don’t know what mysterious forces The Lord uses, his wonders to perform, but I’m guessing he is too well behaved to infringe the 2.4 GHz band.
After several weeks I found that bad USB cables were the problem, and when I finally found one that worked, it kept working most of the time. Others have also reported ‘bad’ USB cables (that work fine elsewhere) can cause problems with CamRanger.

2) The CamRanger comes in a neoprene bag, which you are supposed to hang from the camera or tripod, but that didn’t feel good, and I suspect its wobbling caused the USB-3 connection at the camera to disconnect a few times, so I put some velcro pads on the device so I could stick it to a solid surface, and also bought a very short USB cable that also made the system less vulnerable.

3) Note that the camera must be set to ‘raw capture only’ if you want raw files to be transferred, if you set raw+jpeg then only the jpeg will be transferred.

4) If you have two memory cards in the camera, images from both cards will be transferred, halving the transfer speed. So I take out one, and rely on the computer for backup.

Alternatives
There are many good tethering programs out there, but it turns out that the combination Mac-Nikon knocks out many of them, so I have always used Lightroom connected via USB,
which gives no control of the camera except firing the shutter.
Nikon Control is an expensive option for ‘wired tethered’ (150 USD)

Update May 2016

I have now played with an open source alternative called DDserver, which is firmware that can be installed on the MR3040 router that is the 30 USD hardware basis of the CamRanger. The firmware and associated apps (DSLRDashboard) are shareware.

Installing the firmware on the router is a little intimidating, but most people will know a young nerd who can do it for them in less than half an hour. The user interface is very good, and although the wireless system is still a little unstable (I guess it’s the MR3040’s fault), reconnecting seems to be easier, and vitally doesn’t involve fiddling with the camera end of things, which was the big problem when I had the CamRanger on top of a 12m mast.
It doesn’t support control of the MP-101 head, but that’s a bit of a luxury anyway. (Update July 2016 : I have now built a very cheap and simple remote control for the MP-101. Instructions here.)
Conclusion ? I think I like DDserver more, and at one tenth of the price (plus tips to the author who deserves some financial support), it’s a very attractive option.