Arduino sound trigger construction by Frozentime Images Photography (frozentime.se)

Building a sound-trigger for camera or flashgun. Can easily be modified to use other sensors.
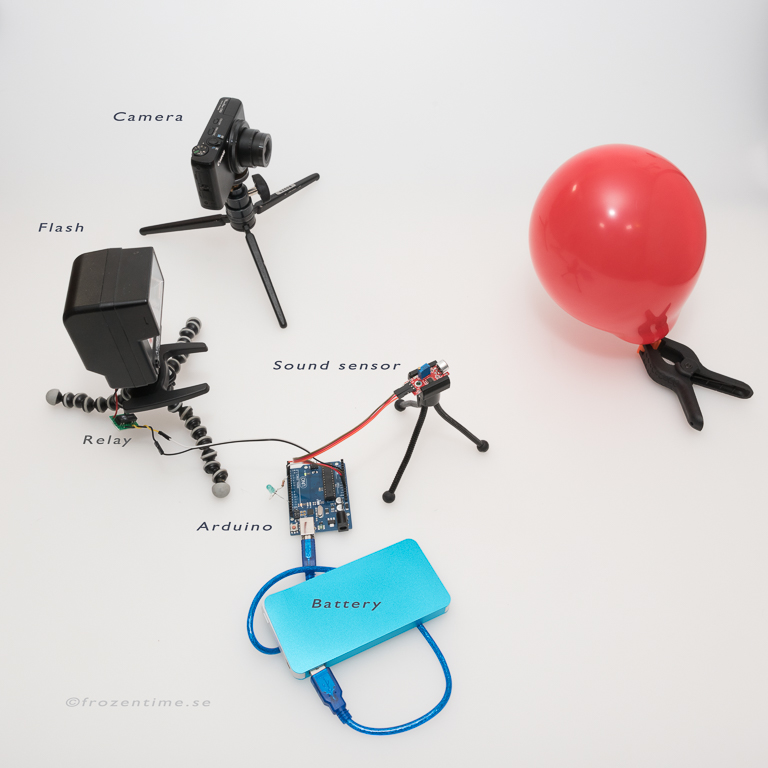
Components needed :
Arduino microprocessor
sound sensor SKU 153949
camera capable of 1 second long exposure (including mobile phone, may need to download an app, depending on model).
flashgun
5v power supply and wires.
The Arduino sound trigger code : simple_sound.code
This code reads a digital signal from pin 2, and outputs a digital signal to pin 3.
When pin 2 goes high, pin 3 is set high. So the code is actually trivial, and the sensor could be connected directly to the sensor. But by including the Arduino, we can add more functionality, like a delay before activation.
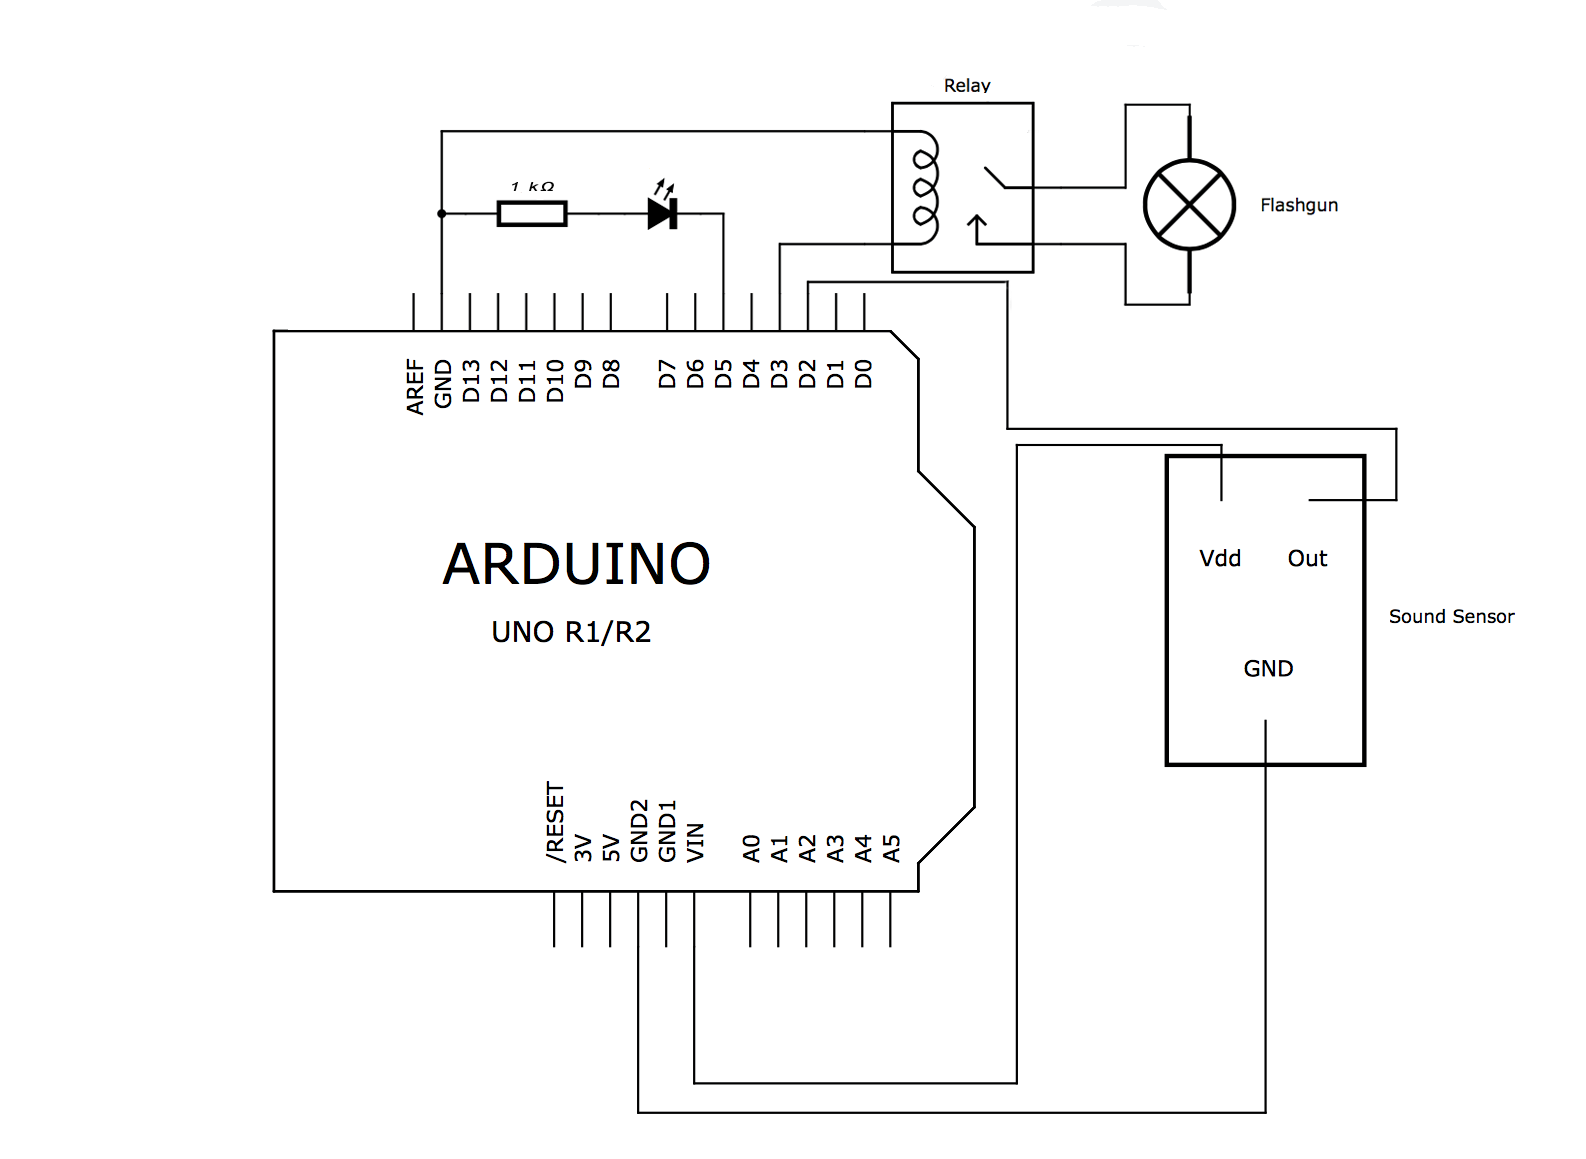
The code also sends a signal to pin 5, identical to the signal at pin 3, so that an LED with 1kΩ resistor can be attached and used for diagnostics.
Building :
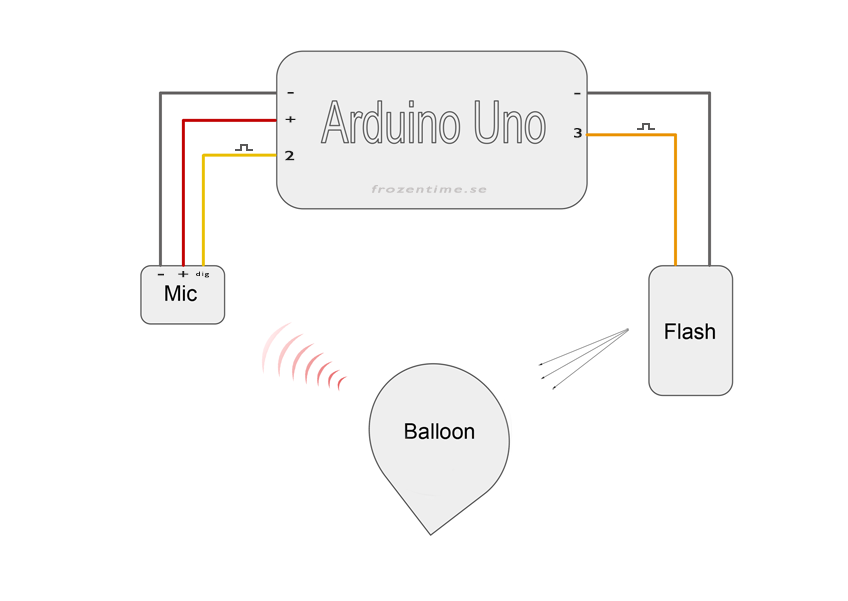
Just 5 wires need to be connected : power and ground from the sensor connect to the corresponding pins on the arduino,
and then the digital out pin is connected to pin 2 of the arduino. Ignore the analog-out pin on the sensor.
Then run a wire from the pin 3 on the arduino, and another from ground to the flash gun.
Some flashguns can be triggered directly from the digital output of the Arduino, but a safer and more versatile solution is to include a relay in the circuit.
You can either make a connector that fits the hot shoe on the flash, or find a way to connect the wires to the centre pin and the ground connectors on the side of the shoe, for example soldering.
Operation :
Test the equipment by clapping your hands near the sound sensor. The flash should fire, and if you added a diagnostic LED, that will light too.
Now you can set the camera for an exposure time of around 1 second, a small aperture (eg f11), and a low ISO (eg 100).
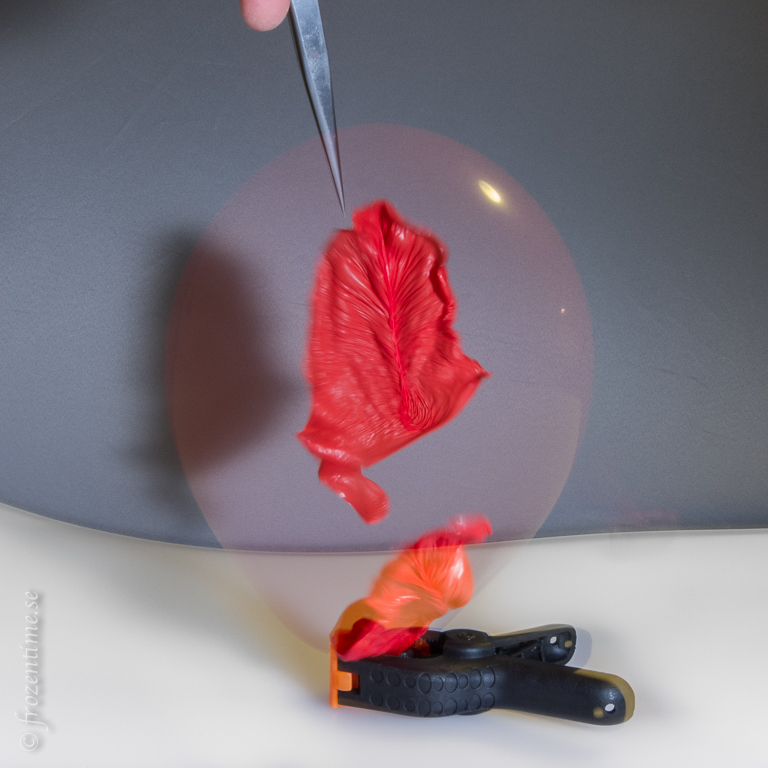
Point the camera at the balloon, open the shutter, and burst the ballon during the time that the shutter is open. Check the image to see that the exposure is good. If the image is too bright, use a smaller aperture, or move the flashgun further away. If it's too dark, move the flash closer or use a larger aperture and/or higher ISO.
The sound that triggers the sensor starts when the balloon is first ruptured. If the camera or flash is triggered at that point, only a small tear will be seen in the balloon.
To see the balloon when it has torn more, a delay needs to be added.
This can either be done by adding a delay in the program running on the Arduino, or more simply by moving the sensor further from the balloon.
Since sound travels at ~ 340 m/s, moving the sensor 34 cm from the balloon will add a delay of 1 mS.
When a party balloon bursts, the whole deflation event takes just one or 2 milliseconds, so any part of the event can be recorded by moving the sensor a few decimeters.
Cheap photographic equipment works fine - the picture here was taken with an old Canon S90 pocket camera, and a flashgun bought at a charity shop for the price of a cup of coffee.
Mobile phones work fine. If you can't control the shutter speed in the native app, you will need to download a separate app. For Apple : Shutter Speed Controller For Android (untested) : https://play.google.com/store/apps/details?id=pl.vipek.camera2_compatibility_test
Slower processes can be photographed by directly triggering the camera, again going through a relay is a good idea.
It's also very easy to swap out Arduino sensors, so you can trigger with a light sensor, or vibration for exampl.
© Mark Harris, frozentime.se